This modification is equally applicable to to the Epson models:

  • C84, C86, C88, D88
  • C64, C66, C68, D68

The C86 printer and similar models (there’s a slew of them!) do not have the trapdoor built into their designs so the instructions for fitting a waste ink tube on these printers is more complex and requires physical modification of the printer.

This is also my third update as I try to improve the page layout and accessibility.

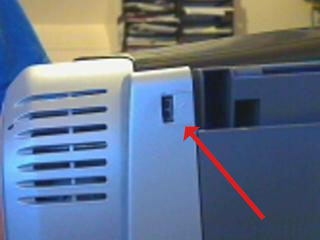
Releasing the side panel (rear tab)

Release the Case Side

To get to the waste ink tube you need to remove the right side of the case (when looking at printer front). First time is always something of a pain to figure out but once you’ve done it once you realised how simple it is.

There are five tabs that you need to release in order to release the side panel and this order tends to work best:

  1. Back tab
    Just push in and lever the panel/case out slightly
  2. Underside – 2 retaining clips
    You’ll need to pinch these together and gently pull the panel out a bit more.
  3. Internally – 2 tabs
    These are not easy to locate but be careful not to break them off (although it won’t be the end of the world if you do). Just level down slightly and ease out the panel some more on each.

You’ll probably be cursing by the time you get it sussed out as tabs and clips slip back in as you tackle the next one but patience prevails and as noted above, once you’ve done it once it’s easy (well -ish!)

Note: If you do break off the internal tabs don’t panic as the other tabs and clips will hold everything in place anyway but just make sure you remove any broken pieces from the printer internals so they don’t jam anything up

Releasing the clips underside
Location of the internal tabs on side panel
High contrast internal picture
Internal view of printer side

Inside & Panel Modification

Ok, now that you have the side panel off you can see the internals as shown in the image left.

What become immediately apparent is that the tube is guided through a small clip/channel (Marked as B) and then into the printer pads so you need to just gently pull the tubing out from under the pads to get the open end.

DO NOT, under any circumstances try to yank the tube or pull the tubing from the front of the printer. If you do that you’ll potentially break the pump and cancel Christmas!

It’s for this reason that you want to make sure that the tube is braced at the clip/channel so that it can’t be pulled out by accident as you do the next few steps so it’s worth taking the time now to use a hot melt glue gun or find some other way to glue/hold the tube in the clip/channel as shown.

As already noted, the C8x series printer does not have a handy trapdoor for you to redirect the waste tube out through. So, you’re going to need to drill a hole for the tube to come out.

The image left shows the best place to make this hole (C).

Whilst it might be tempting to take a shortcut and just thread the tubing through the vent grills (marked as D) you should avoid this as ink will not all be pumped to the bag and will just seep back into the parking pads, soiling the printheads and creating a mess. In short DON’T!

Drill point for case
Preparing your extension tube Assuming you have a Waste Ink Kit from OctoInkjet you should now seperate the barbed fitting from the tubing so you can push the tubing through the hole.
tube preparation #2 Now, push the wide part of the fitting into the printers waste tube, being careful not to pull the tubing off the pump!
tube preparation #3 Next, thread the open end of the kit tubing (or the tubing you’re using) in, through the hole in the panel
Joining the two tubes together Now, push the  barbed fitting into the tubing you just threaded above and complete the connection.
Getting the connector and tube in right position Being careful not to kink the tubing or pull the tubing off the pump or connection, gently pull the kit tubing through the panel until the barbed fitting is flush (or relatively close) to the panel hole.

Note: the reason you have the fitting on the inside of the panel is that it helps stop any accidents with the external bag/tank pulling the tubing off the pump in the printer.

Now, carefully re-align and push the panel back into place, being careful not to kink the tube.

Note #2: Any kinks or folding in the tube will stop ink from flowing to the external bag/tank so take your time.

The finished installation

Finished

With the panel in place you now just connect your bag or external tank to the end of the tubing and then test the kit is working (if you haven’t already).

The C84, C86, D88, C88 are all pretty much the same printer with minor variations in ink and firmware so these instructions will only differ slightly in terms of the case colours. Otherwise it’s simple.

Resetting the waste ink counter

The SSC utility should reset these printers now without any problems

Leave a Reply

This site uses Akismet to reduce spam. Learn how your comment data is processed.