We’re now able to offer a video guide of the process via YouTube:


An older slideshow of the process is also available below:

Note: This guide also covers the following Epson printer models:

BX525WD
SX525WD
TX525WD
B42WD
T42WD

This guide is primarily aimed at OctoInkjet customers who have purchased a Solo-X10 waste kit (Release pending) although customers with the earlier Solo+ can still apply some of the steps to their kit (but without the extra connector part to act as the strain relief).


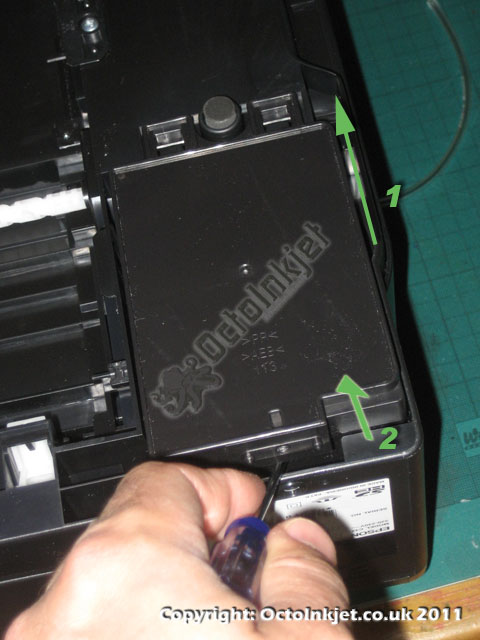
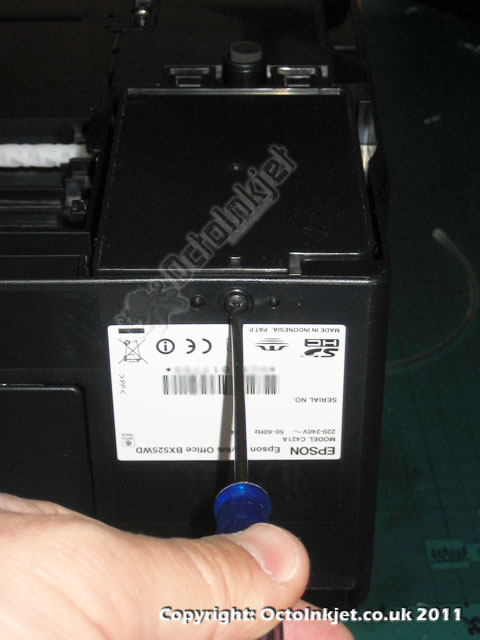
Remove Screw holding tank in place

Identify and Release the Waste Pad Holder

The waste pad in the BX525 is located in the base of the printer (back right). Unlike the PX7xx/8xx models there is no metal plate but it’s easy to recognise and you will need to turn the printer over to get at it easily.

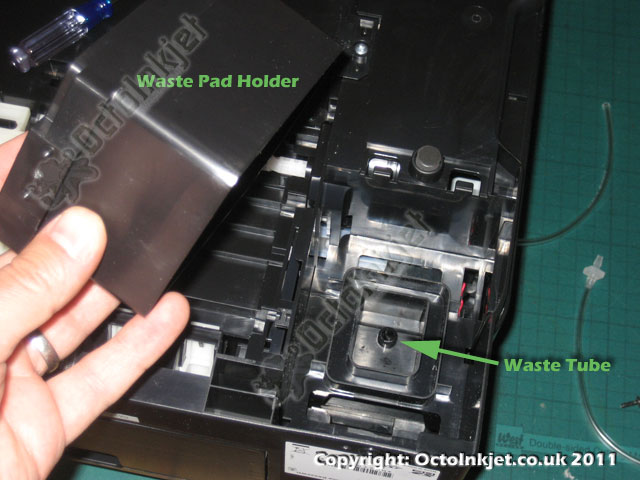
Push the tank backwards and lever it out

Remove Retaining Screw & Removing the Waste Tank

To release the waste pad holder, you need to:

  • Remove the screw
  • Push the tank holder backwards away from you (See 1. left)
  • Lever the tank up and out (See 2. left)

Once you have removed the tank you will see the waste tube as indicated in Image #3 below/left.

Remove the waste tank holder
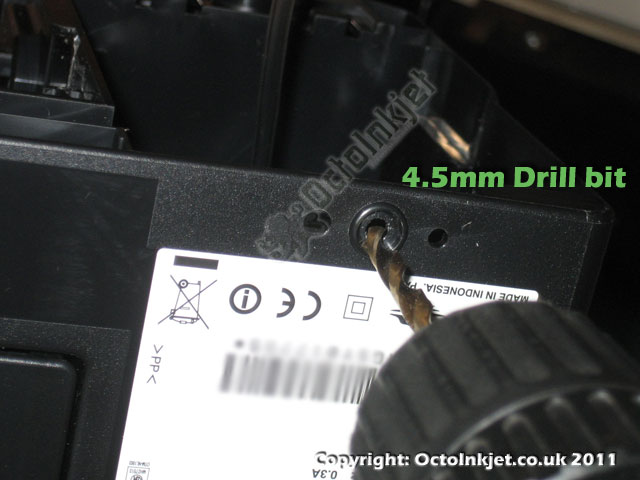
Widen the screw hole

Widen the Screw Hole to allow Tube in/out

If you want to install the kit with the extra connecter you will need to expand the hole to at least 4.5mm diameter.

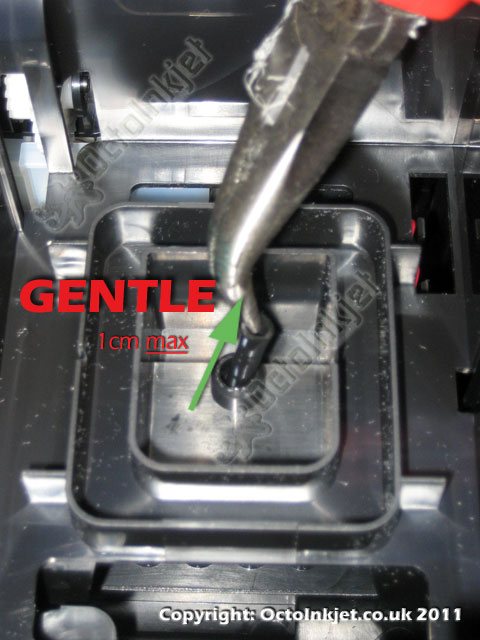
Extend the printers waste tube out 1cm

Gently Extend the Waste Tube

You need to connect the plastic barbed connecter to the original waste tube but first you’ll need to extend the tube so you can get it in.

Tip: DO NOT over extend the tube or you will break it off the pump… 1cm should be more than enough.

Hold/pinch tube and insert connector

Connect the first Connector and Tube Part

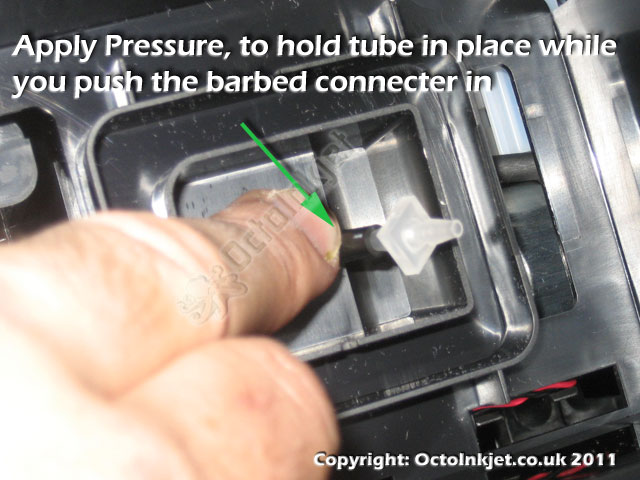
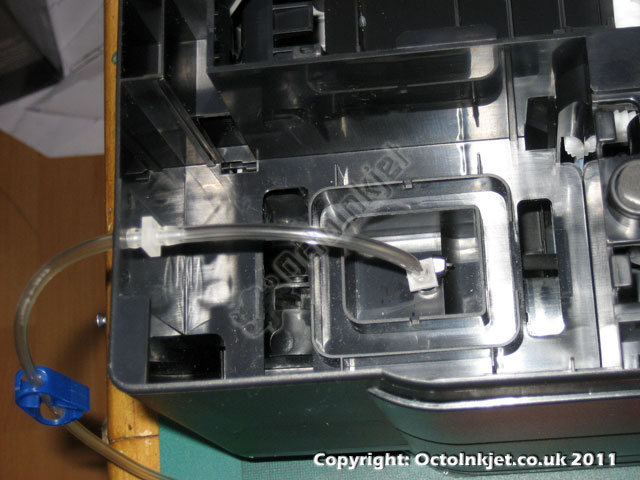
The Solo-BX tube part consists of two sections of tubing, and two barbed connectors. Remove one of these connectors from the kits tube part and insert it into the printers own waste tube.

Tip: Pinching the tube against the sides of the hole it pokes out of, can help stabilise it while you push the connector in.

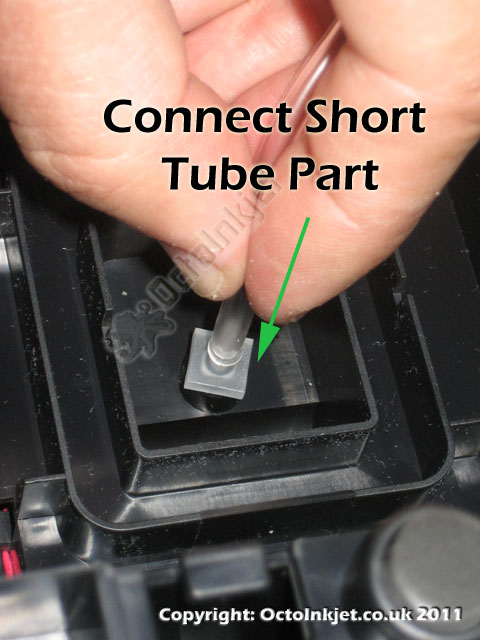
Once the connector is on you then need to attach the shorter of the two tube pieces to your newly installed connector (Image #7, left).


Connect the shorter/inner tube part
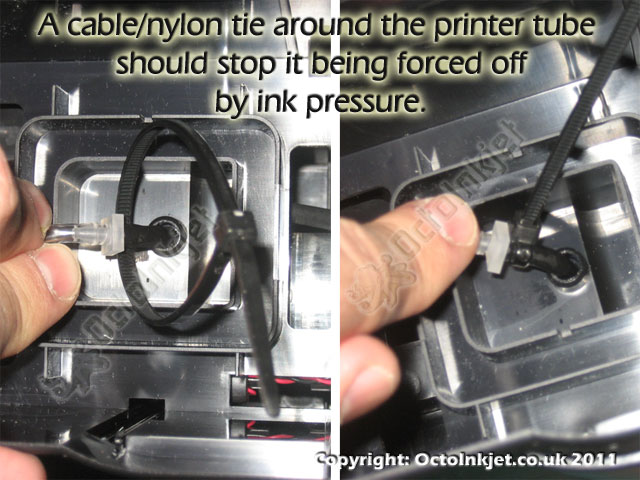
A cable tie can stabilise the connecter and stop it being forced off

Securing the Connector to the Printers Waste Tube

The connection between the extension and tube is not particularly strong due to the difficulty in getting a wider fitting into the printers own waste tube.

Naturally this means the waste ink could force the connector off (definitely NOT a good thing) so using the provided cable-tie will help secure the printer tube end of the connection. (See split image – left)

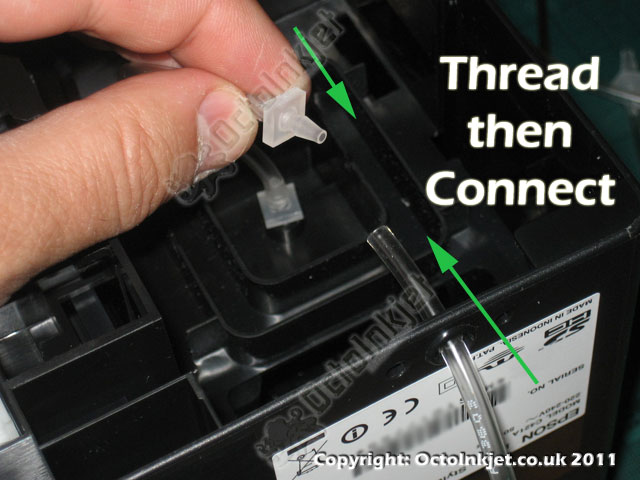
Thread the external tube through the expanded hole and join together

Thread and Connect Kit Tube Sections Together

Assuming you have expanded the screw hole you need to thread the longer tube part through the hole and then reconnect the two parts using, yes… a connector (I like that word a lot… can you tell?)


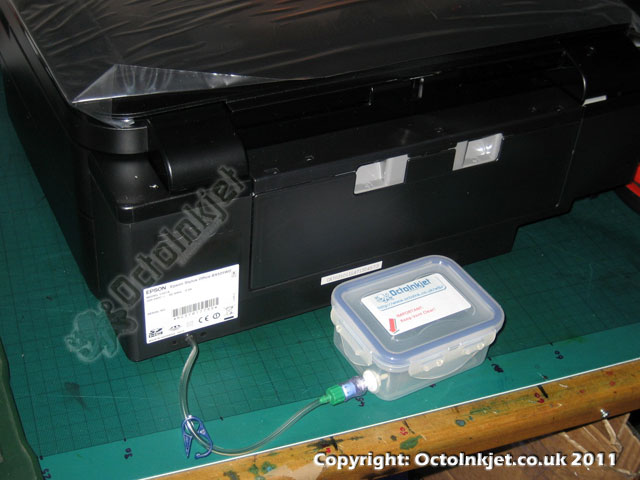
Alternatively, if you didn’t bother with the hole expansion, you just make sure you’ve joined them together and the tube will end up running under the back of the printer.

Tubing part all connected and done

Tubing Part All Done

.. and you’re done… If you have the tubing all hooked up and ready to go (as shown left) then you’re ready to turn the printer back over.

All finished, tank installed..

Finished

Kind of obvious but at this point you turn the printer back over (No, you can’t and shouldn’t reinstall the waste tank… it won’t fit).

It’s now a good idea to make sure there are not folds or kinks in the tubing so that ink will be able to flow to the tank and then connect the tank.

IMPORTANT: To ensure you do not get caught out by the tube blowing off or some part failure, it’s recommended that you place your printer on some form of lipped tray or protected surface. I would also recommend placing some absorbant material (such as folded kitchen towel/paper-roll) in the area under the exposed tank to catch any ink that might be expelled here.

Resetting the Waste Ink Counter

The only option is currently the WICReset utility.
Compatibility for this was added on September 30th 2011

Important:
Whichever utility you use you must be connected to your printer using a USB cable. None of the reset utilities will work over a network connection

Remember: The most up to date information on reset utilities will be available via the QuickFind tool.

Leave a Reply

This site uses Akismet to reduce spam. Learn how your comment data is processed.