This guide has been replaced by the printed instruction booklet produced for the Duo-15 Printer Potty kits. While this guide is still useful it is not as high a standard or as clear as the new version.
Note: This guide also covers the following Epson printer models:
R1900
R2880
R2000
… and some aspects of releasing the side panel for the B1100 and T1100 models
OK… here are the step by step instructions fitting a Duo / Duo-15 waste kit to a compatible printer.
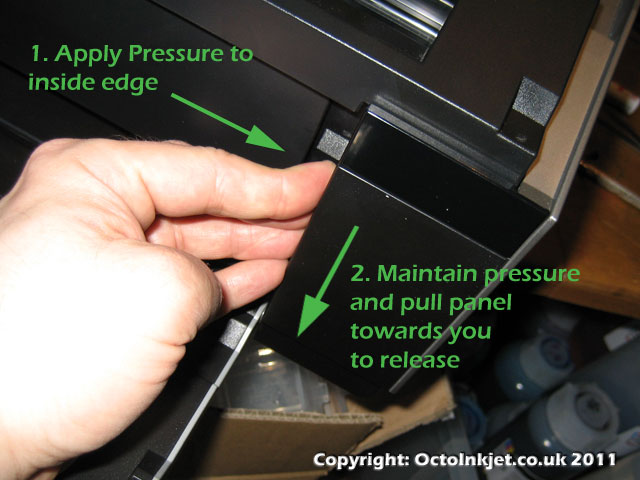 |
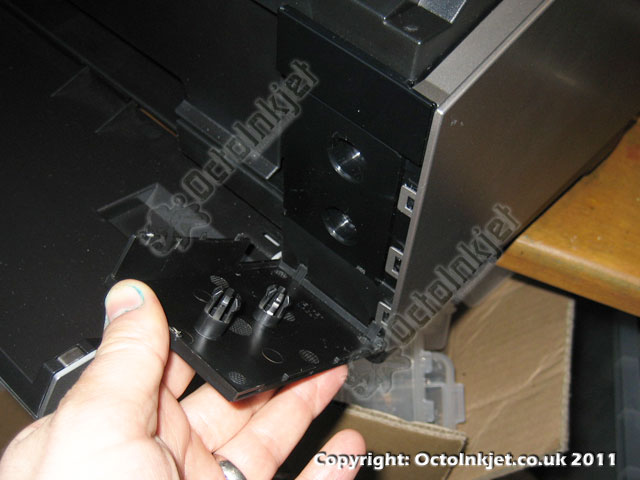
Removing Front PanelUltimately you want to remove the side panel to access the waste tubes but there are two stages to tackle before you can do this. The first is the right side front panel which can be released by:
|
 |
|
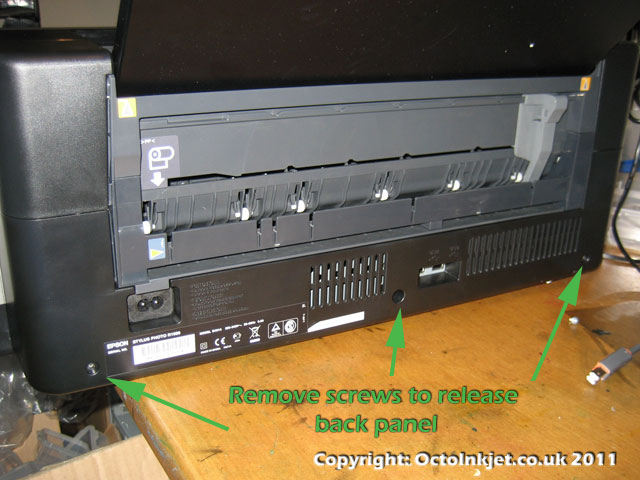 |
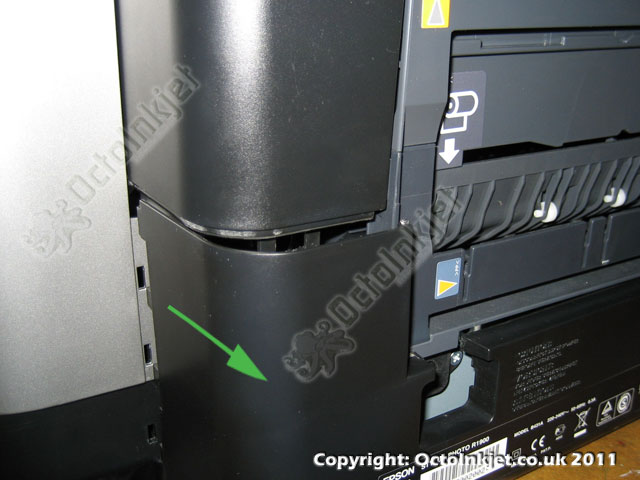
Release Back PanelThe back panel also holds the side panel in position so you will need to release this enough to free the side panel. To complete this step you need to:
* “left” when as seen from back of printer |
 |
|
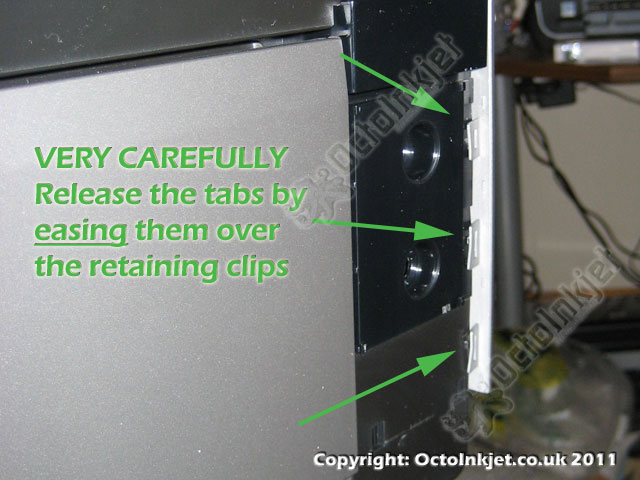 |
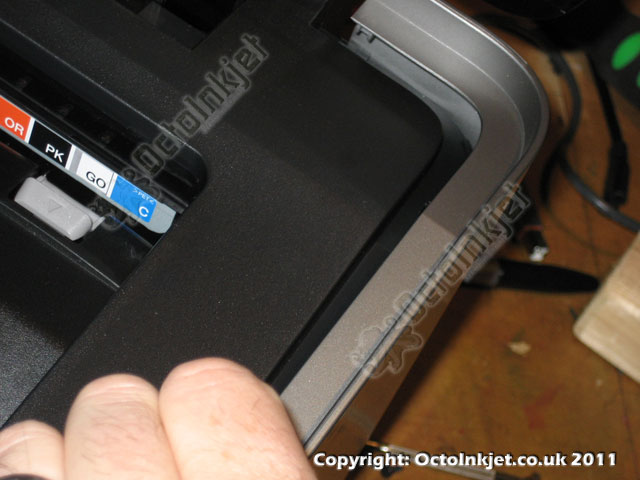
Release Side PanelThis part of the operation is the trickiest due to the fragile nature of the tabs holding the front edge of the side panel to the case. A few things to note:
So, to complete the panel removal you need to:
|
 |
|
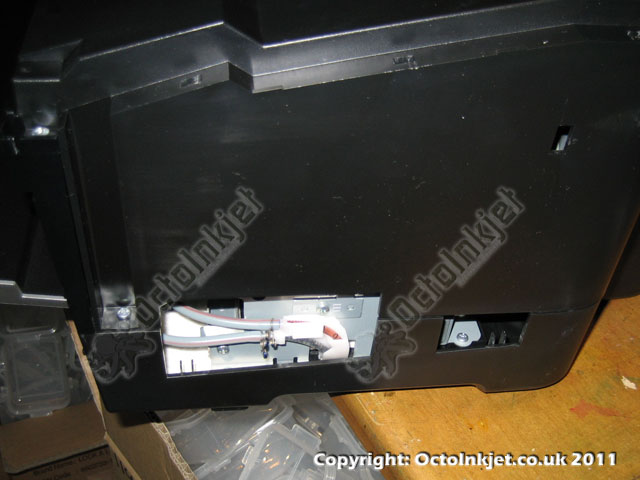 |
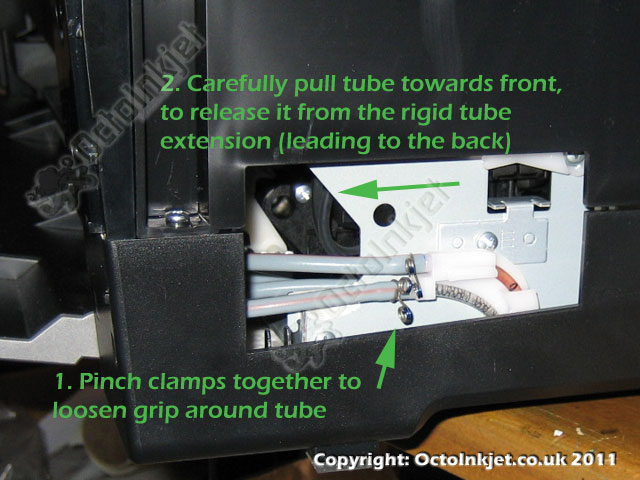
Accessing and Releasing the Waste TubesOnce the side panel has been released and removed it’s well worth taking a break as you’re past the really nasty bit. When you’re ready you should now see the waste tubes (as per 7. left). You will need to release the flexible grey tubes from their mount points and these will then be connected to your tube extensions later. To release:
IMPORTANT: Take your time with this stage and work the tubes free carefully! |
 |
|
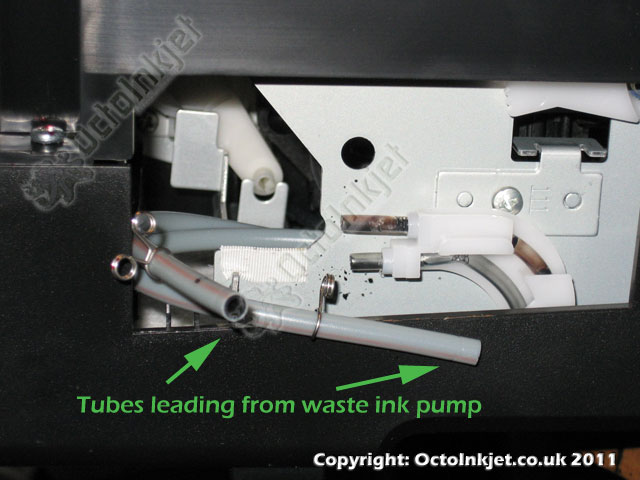 |
Success – Waste Tubes ReleasedAssuming you haven’t hit any problems you should now have your waste tubes release (as per 9 left). |
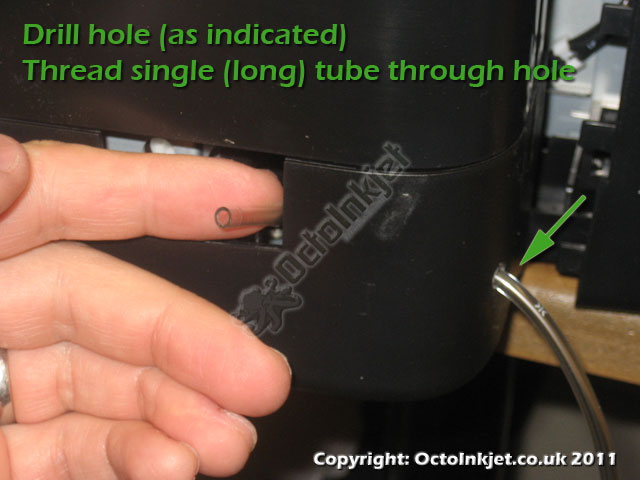 |
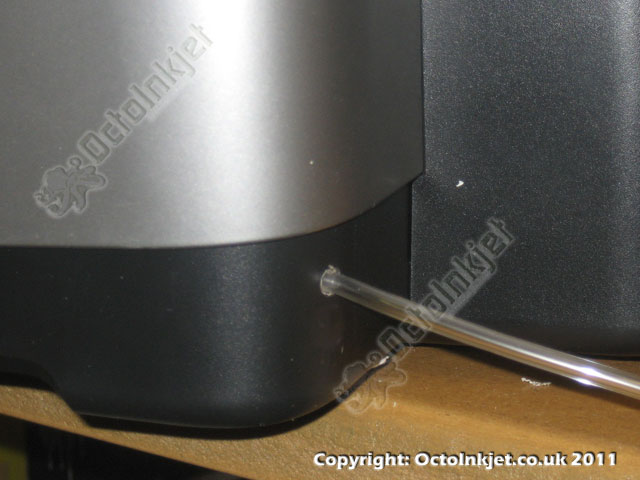
Modifying and Inserting Primary Extension TubeYou will need to modify your printer case slightly to extend your waste tube out of the printer so drilling a single hole (large enough to accept your kits waste tube) is required. Tip: Remember the hole needs to be below the side panels position when it is replaced. Once you have the hole made, remove the Y-part of your Duo kit and insert the free end through the hole, threading it forward as shown (see 10 left).
|
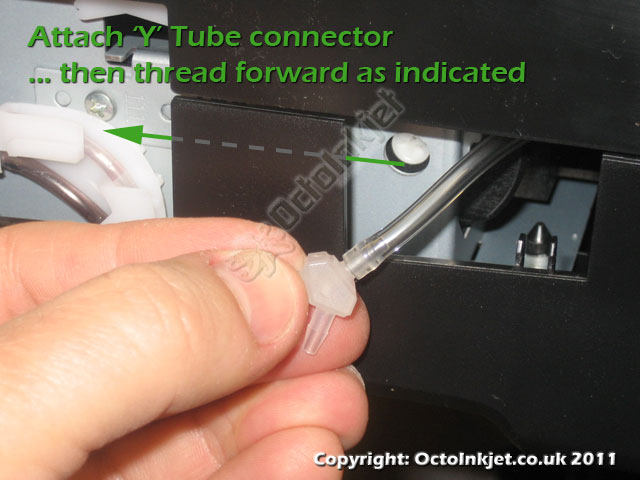 |
Thread Tube Extension and Re-attach Tube PartsWith the primary extension tubing inserted attach the Y-part and continue threading the tubing forward |
 |
|
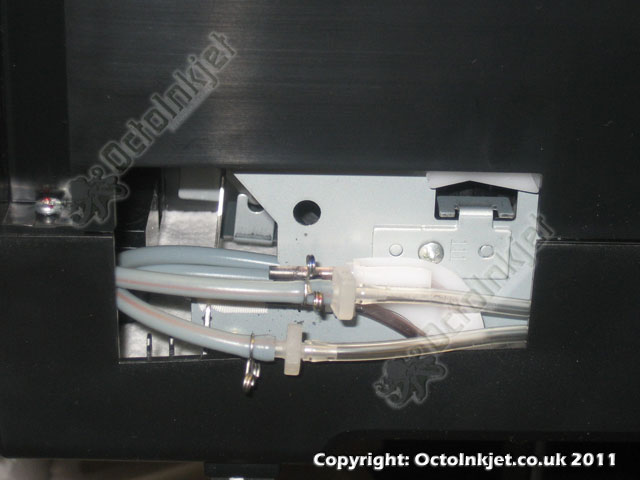 |
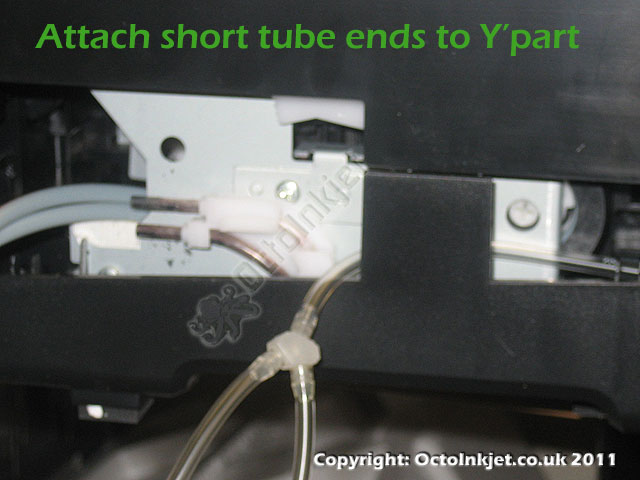
Connecting Waste Tubes to Kit Extensions.Finish off the connections by joining the extension parts to the original waste tubes and then gently pulling the external tube part out to take up the slack. (see 13. left) |
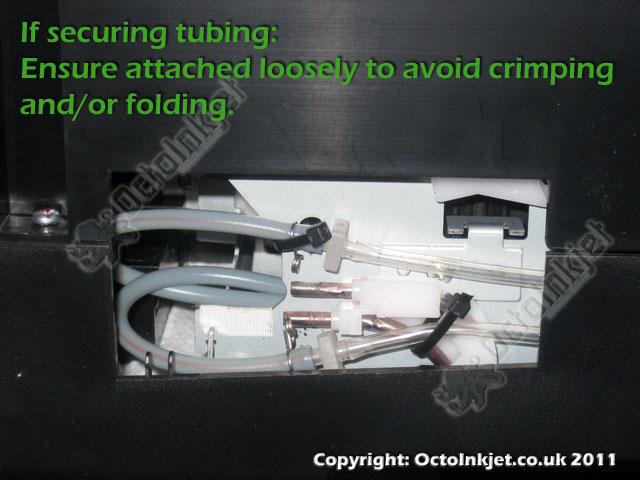 |
Optional: Securing Waste TubesThis is entirely optional but you may want to secure the tubing so that it doesn’t flop about or get caught when replacing the side panel. Few things to remember when securing the tubes:
|
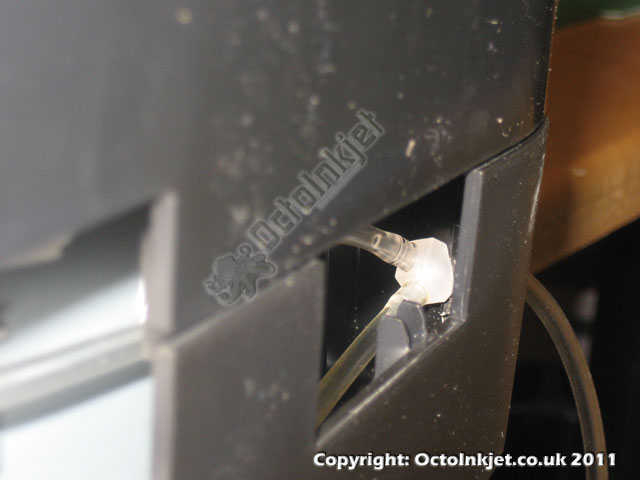 |
Duo-15: Y-part positionIf you have a Duo-15 waste kit then your extension tube parts (the shorter tube bits) will allow you to pull the Y-part back to the hole in the back of the case. In this position the part acts as a strain relief and stops the inner tubing being stressed or stretched if someone catches or pulls the external tubing. Note: The standard Duo waste kit tubing has 10cm parts so will not allow the Y-part to reach to the back without potentially kinking the printers waste tubes.. Wrapping some electricians tape (at the 5cm point back from the Y-part) on the long tubing part, will act as an alternative strain relief if you need one. |
 |
FinishedWith the tubing fitted you now reinstall the case panels in reverse order. However remember to attach the side panel carefully so the waste tubes are not caught, crimped or otherwise in a way that would stop waste ink flow. Attach your waste tank and you are good to go. |
Resetting the Waste Ink Counter
Both the R1900 and R2880 are supported by AdjProg service utilities and these are freely available with any Duo / Duo15 waste kit purchase (1 per kit).
The R2000 is only currently supported by the WICReset Utility (key purchase required)
The R1900/R2880 are also compatible with the WICReset Utility (key purchase required) for those who don’t wish to purchase a waste kit or who only have access to Apple Mac iOS systems.
Remember: The most up to date information on reset utilities will be available via the QuickFind tool.
