The original instructions (below) have now been revised and reworked with new images of the whole process step-by-step.

The new instructions are provided in a printed 12 page manual which is now included with all new Duo-Max Printer Potty kits.

The original guide (below) has been left for those still wanting to refer to it

R3000 Installation Guide (version 1 – old)

Note: This guide is copyright of OctoInkjet and has been produced with the help of Nelson Lau.

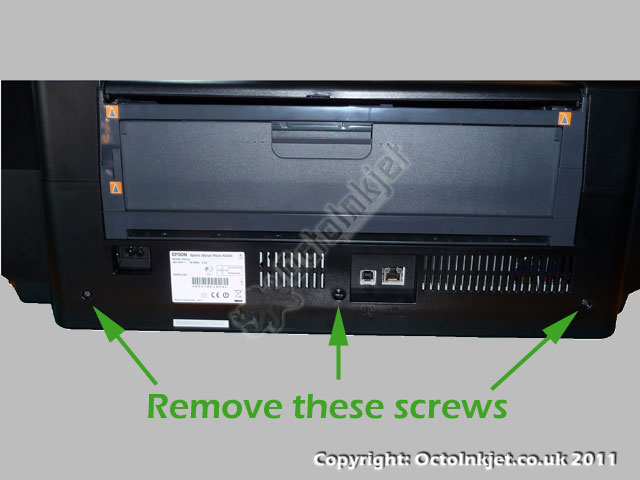
Remove rear panel screws

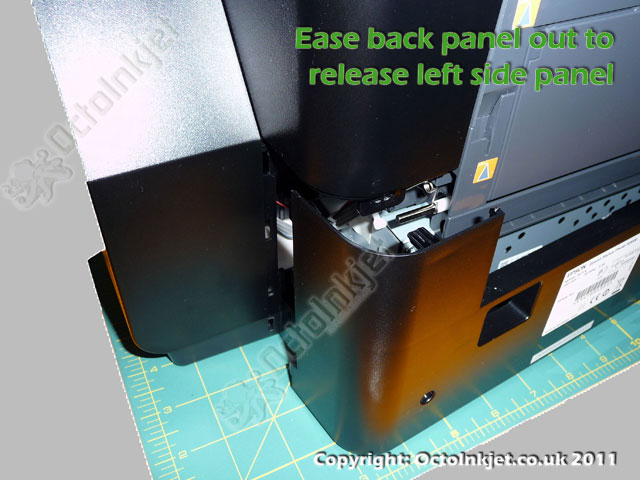
Release and Remove Rear Panel

Ultimately you want to remove the side panel to access the waste tubes but before you can complete this process you’ll need to release it from the back panel which also holds it in at the back.

You can release the rear panel by:

  • Removing the screws (as indicated image #1 left)
  • Gently ease the rear panel back and out so the tabs are no longer inserted into the side panel
Ease the left side (when viewed from back) out to release side panel
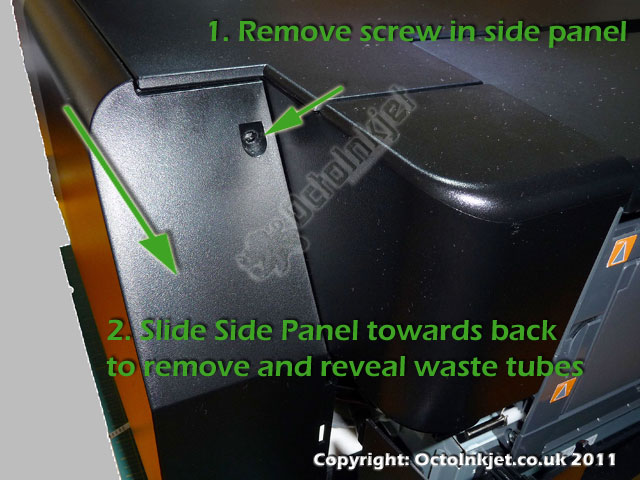
Remove screw at top/rear of side panel

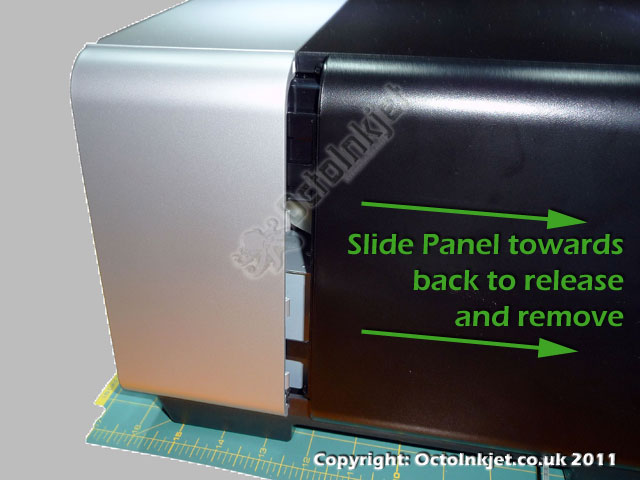
Release and Remove Side Panel

The side panel is also held in by a single screw so you’ll need to remove this and then simply slide the panel towards the back of the printer until you can remove it.

Slide side panel towards back and remove
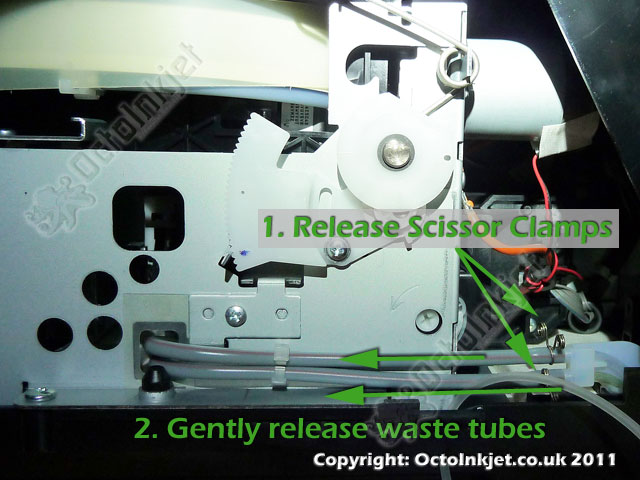
Release scissor clamps and then waste tubes

The Waste Tubes

As shown in image (#5 left) there are two waste tubes in this printer and these need to be released and connected to your Duo kit tubing part.

Releasing the scissor clamps is simply a case of pressing the two ends together and sliding them back towards the front of the printer.

You then ease the grey tubing (with red stripe) off the clear plastic extension part to release the waste tubes.

Attach waste tube exension part

Attaching Extension Tube Part

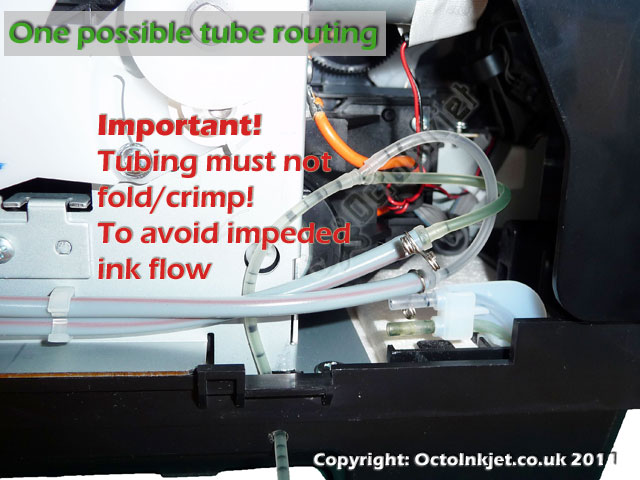
With the grey tubes released you then connect the barbed connecters on your Duo extension part to the open ends.

Notes:
1. The part shown is similar to a Duo tubing part
(but an inferior/cheap copy with a significantly reduced tube diameter that will cause problems with ink flow)
2. The exit point shown is one suggestion but is sub-optimal due to the potential for the tube to kink/fold and thus block waste ink from exiting the printer.

Alternative exit points for waste tube

Alternative Exit Points

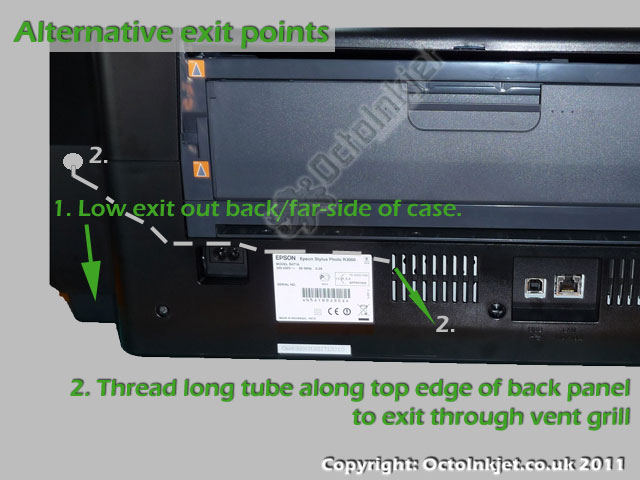
Rather than using the exit point show in the image (above left) there are two alternative exit points to consider.

1. Still involves drilling but allows the single extension tube to exit the back of the printer and avoids the potential for kinking/folding.

2. Involves a longer tube part threaded along the inside top edge of back panel and out of the vent grill avoiding the need for drilling.

Re-install side and rear panels

Finished

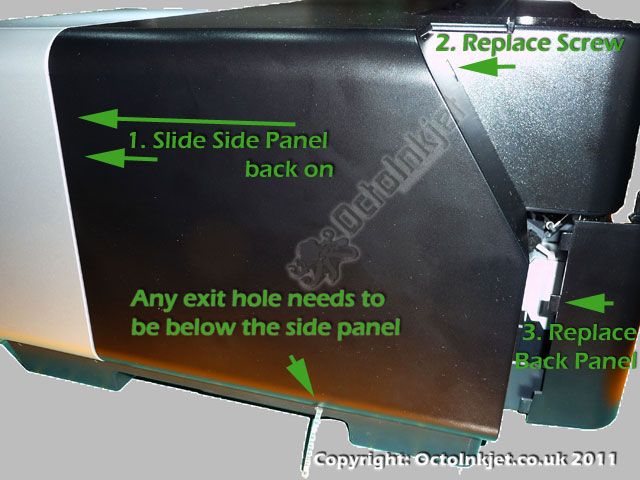
Whichever strategy you opt for with your R3000 waste tube you can now reinstall the panels in reverse order.

However remember to attach the side panel carefully so the waste tubes are not caught, crimped, folded or otherwise in a way that would stop waste ink flow.

Attach your waste tank and you are good to go.

Resetting the Waste Ink Counter

The R3000 is compatible with the WICReset Utility.

Leave a Reply

This site uses Akismet to reduce spam. Learn how your comment data is processed.