While this guide demonstrates the process for fitting a Printer Potty to the RX560, the case and waste system design is equally applicable to the following models:

  • RX580
  • RX585
  • RX590
  • RX595
  • RX610
  • RX640

The model RX560 has been used as a reference for ease, throughout.


Whilst this printer is another “trapdoor” style printer the location of this trapdoor/hatch is located in the front of the printer so many users tend to miss it.


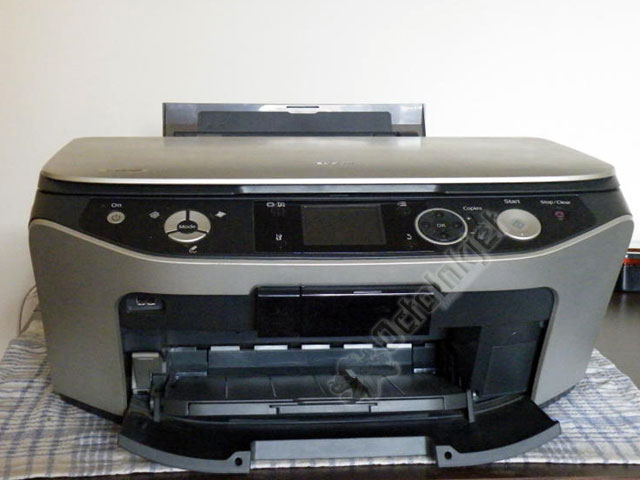
Epson RX560

Locating The Trapdoor (Access hatch)

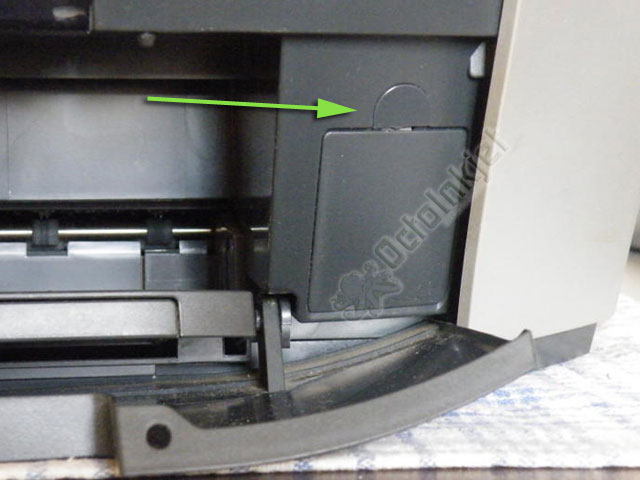
As noted earlier the RX560 has its trapdoor located in the front of the printer, to the right of the paper output area.

Picture #2 (left) shows the location of the screwhold cover, with the trapdoor itself located just below it.

RX560 access-hatch/trapdoor location
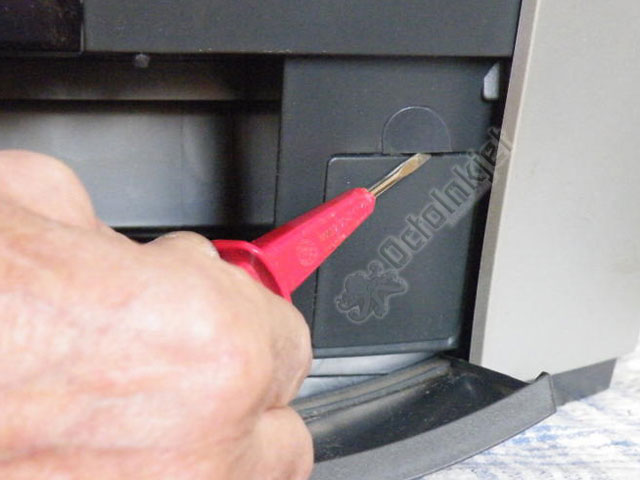
RX560 - release the screw cover

Remove the Screw Cover

The trapdoor is held in place by a screw which is covered by a semi-circular flat cover indicated in picture #2 (above left).

Removingt his cover is relatively simple using a thin flat blade like a flathead screwdriver to prise it off.

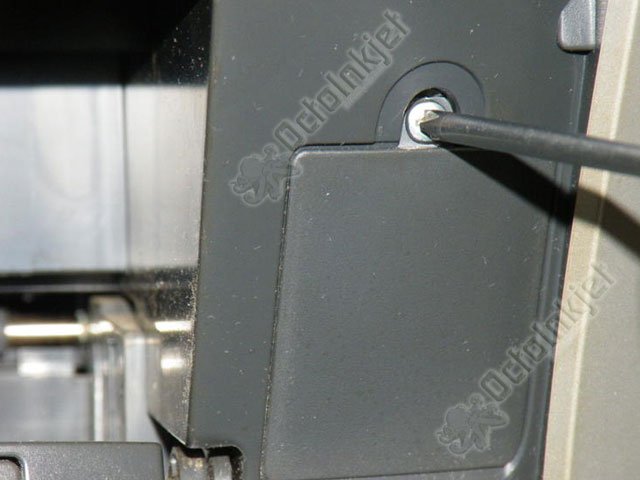
RX560 - Screw cover removed. Remove screw

Remove Screw to Release Trapdoor

Picture #4 (left) shows the screw, once the cover is removed.

You now need to unscrew the screw using a phillips/cross-head screwdriver and this will release the trapdoor, allowing it to be removed.

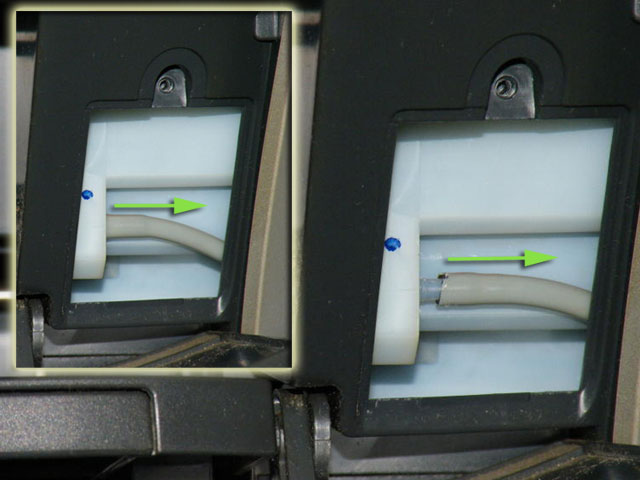
RX560 - Trapdoor removed. Release waste tube

Trapdoor Removed. Release the Waste Tube

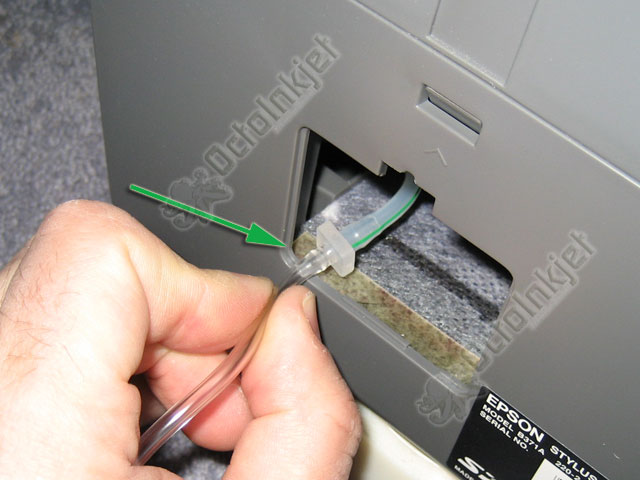
With the screw removed you can remove the trapdoor/hatch itself and see the waste tube connected to the internal waste pad holder.

To release the waste tube itself you gently pull the tube away from the tank, as indicated by the green arrow in picture #4 (Left).

RX560 - Connect OctoInkjet waste kit

Connect Waste Kit

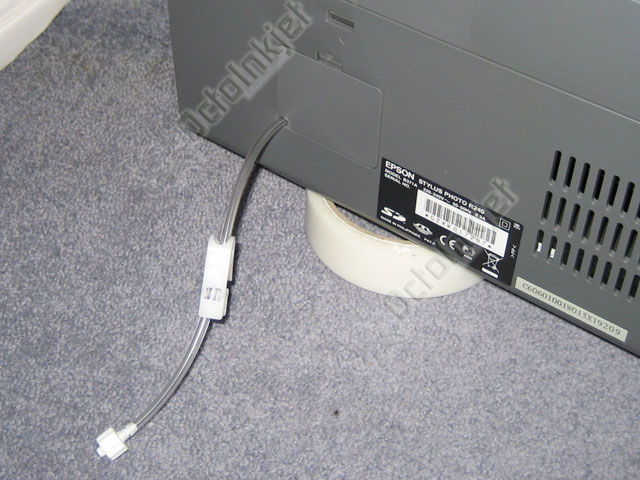
Now that the waste tube is free you just need to connect it to your waste kit using the connector provided.

Note: Because the tube comes out of the front of the printer and the hatch is located behind the output tray’s closed position, it will not be possible to close your printer output tray.

Position the tube so it can exit without folding or crimping the tube The RX560/640 used to demonstrate the instructions above lacked images for this and following steps.
However, the process is very similar to those used for the R240 (shown left/below), so while the printer shown is different from your model, it should still provide ample information to complete the task.

Modifying the Hatch Cover (Trapdoor)

After you have freed the tube you then follow the standard process of connecting your waste ink kit using the barbed connector and modifying your trapdoor.

IMPORTANT: Any kinking or folding of the tube will restrict ink flow to the waste tank so make sure the tube bends gently and is in the correct position.

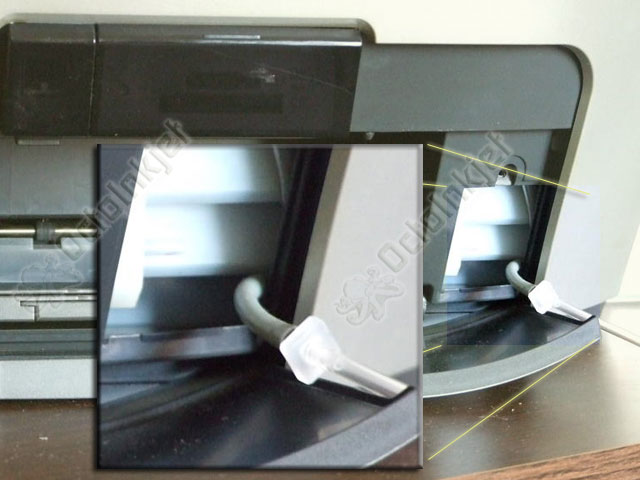
Replace trapdoor The image (left) shows how things should look* with the connector inside the printer, and the trapdoor replaced (*on the R240)

Note: On the RX560/640 the tube would exit from the right/bottom of the door as that’s the best location to allow the tube to bend behind the trapdoor without kinking/folding.

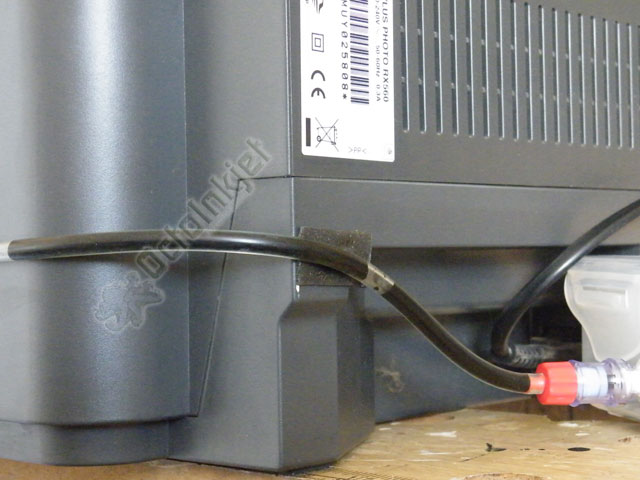
RX560 - Waste ink tank installed

Finished

Now you just connect your waste tank to the end of the tubing and then test the kit is working (if you haven’t already).

You are now ready to reset and use your printer again

Resetting the waste ink counter

A WICReset key is required in tandem with the appropriate utility for your operating system. More information is available here

Leave a Reply

This site uses Akismet to reduce spam. Learn how your comment data is processed.