The Epson RX640 is built in the same way as the RX560, RX580, RX585, RX590, RX595 and RX610 models from Epson so this guide will apply equally to those models as well.
Note: A more comprehensive guide for the RX560 is now available and the overall design of the printer is very similar, if not identical to this model. You may find the RX560 guide a useful additional resource to successfully complete your kit installation.
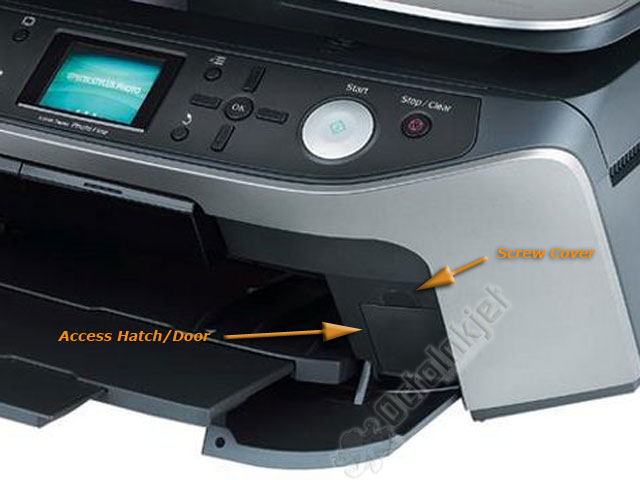
This printer has an access door/hatch in the front right of the printer. It is located to the right of the paper output tray and covered by the tray when the tray is in the closed position.
 To access the waste tube you need to pop the semi-circular cover located above the hatch. This covers a screw
You then remove the screw so you can remove the hatch.
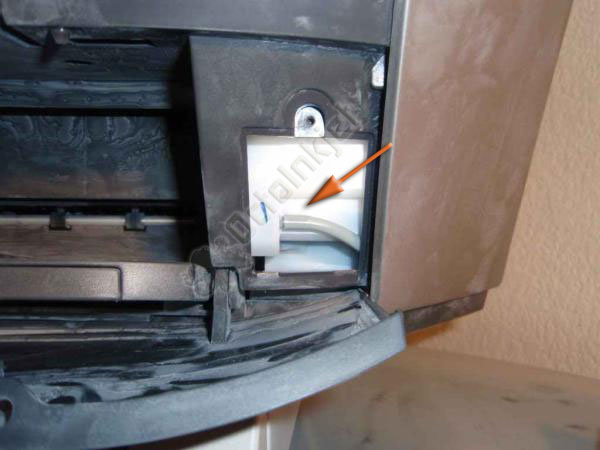
 With the screw removed you then remove the hatch/door to reveal the waste ink tube and it’ connection point to the tank that holds the original waste ink pads.
You now release the tube from the tank nipple and then plug in your extension tube.
At this point you will also need to drill or notch the access hatch/door to allow the tube to exit the printer and still replace the hatch and put the screw back in.
We don’t have any specific pictures of a modified door but you do try to keep the tube access point (ie: the hole/notch) as low down the door as possible.
